
Appearance
Locations & QR tickets
Your locations are the physical places where goods enter and leave your custody. QR tickets are the vouchers scanned there to confirm a handover and settle a payment in one gesture.
Locations
Locations in the sidebar (/p/locations) lists your warehouses and drop points.
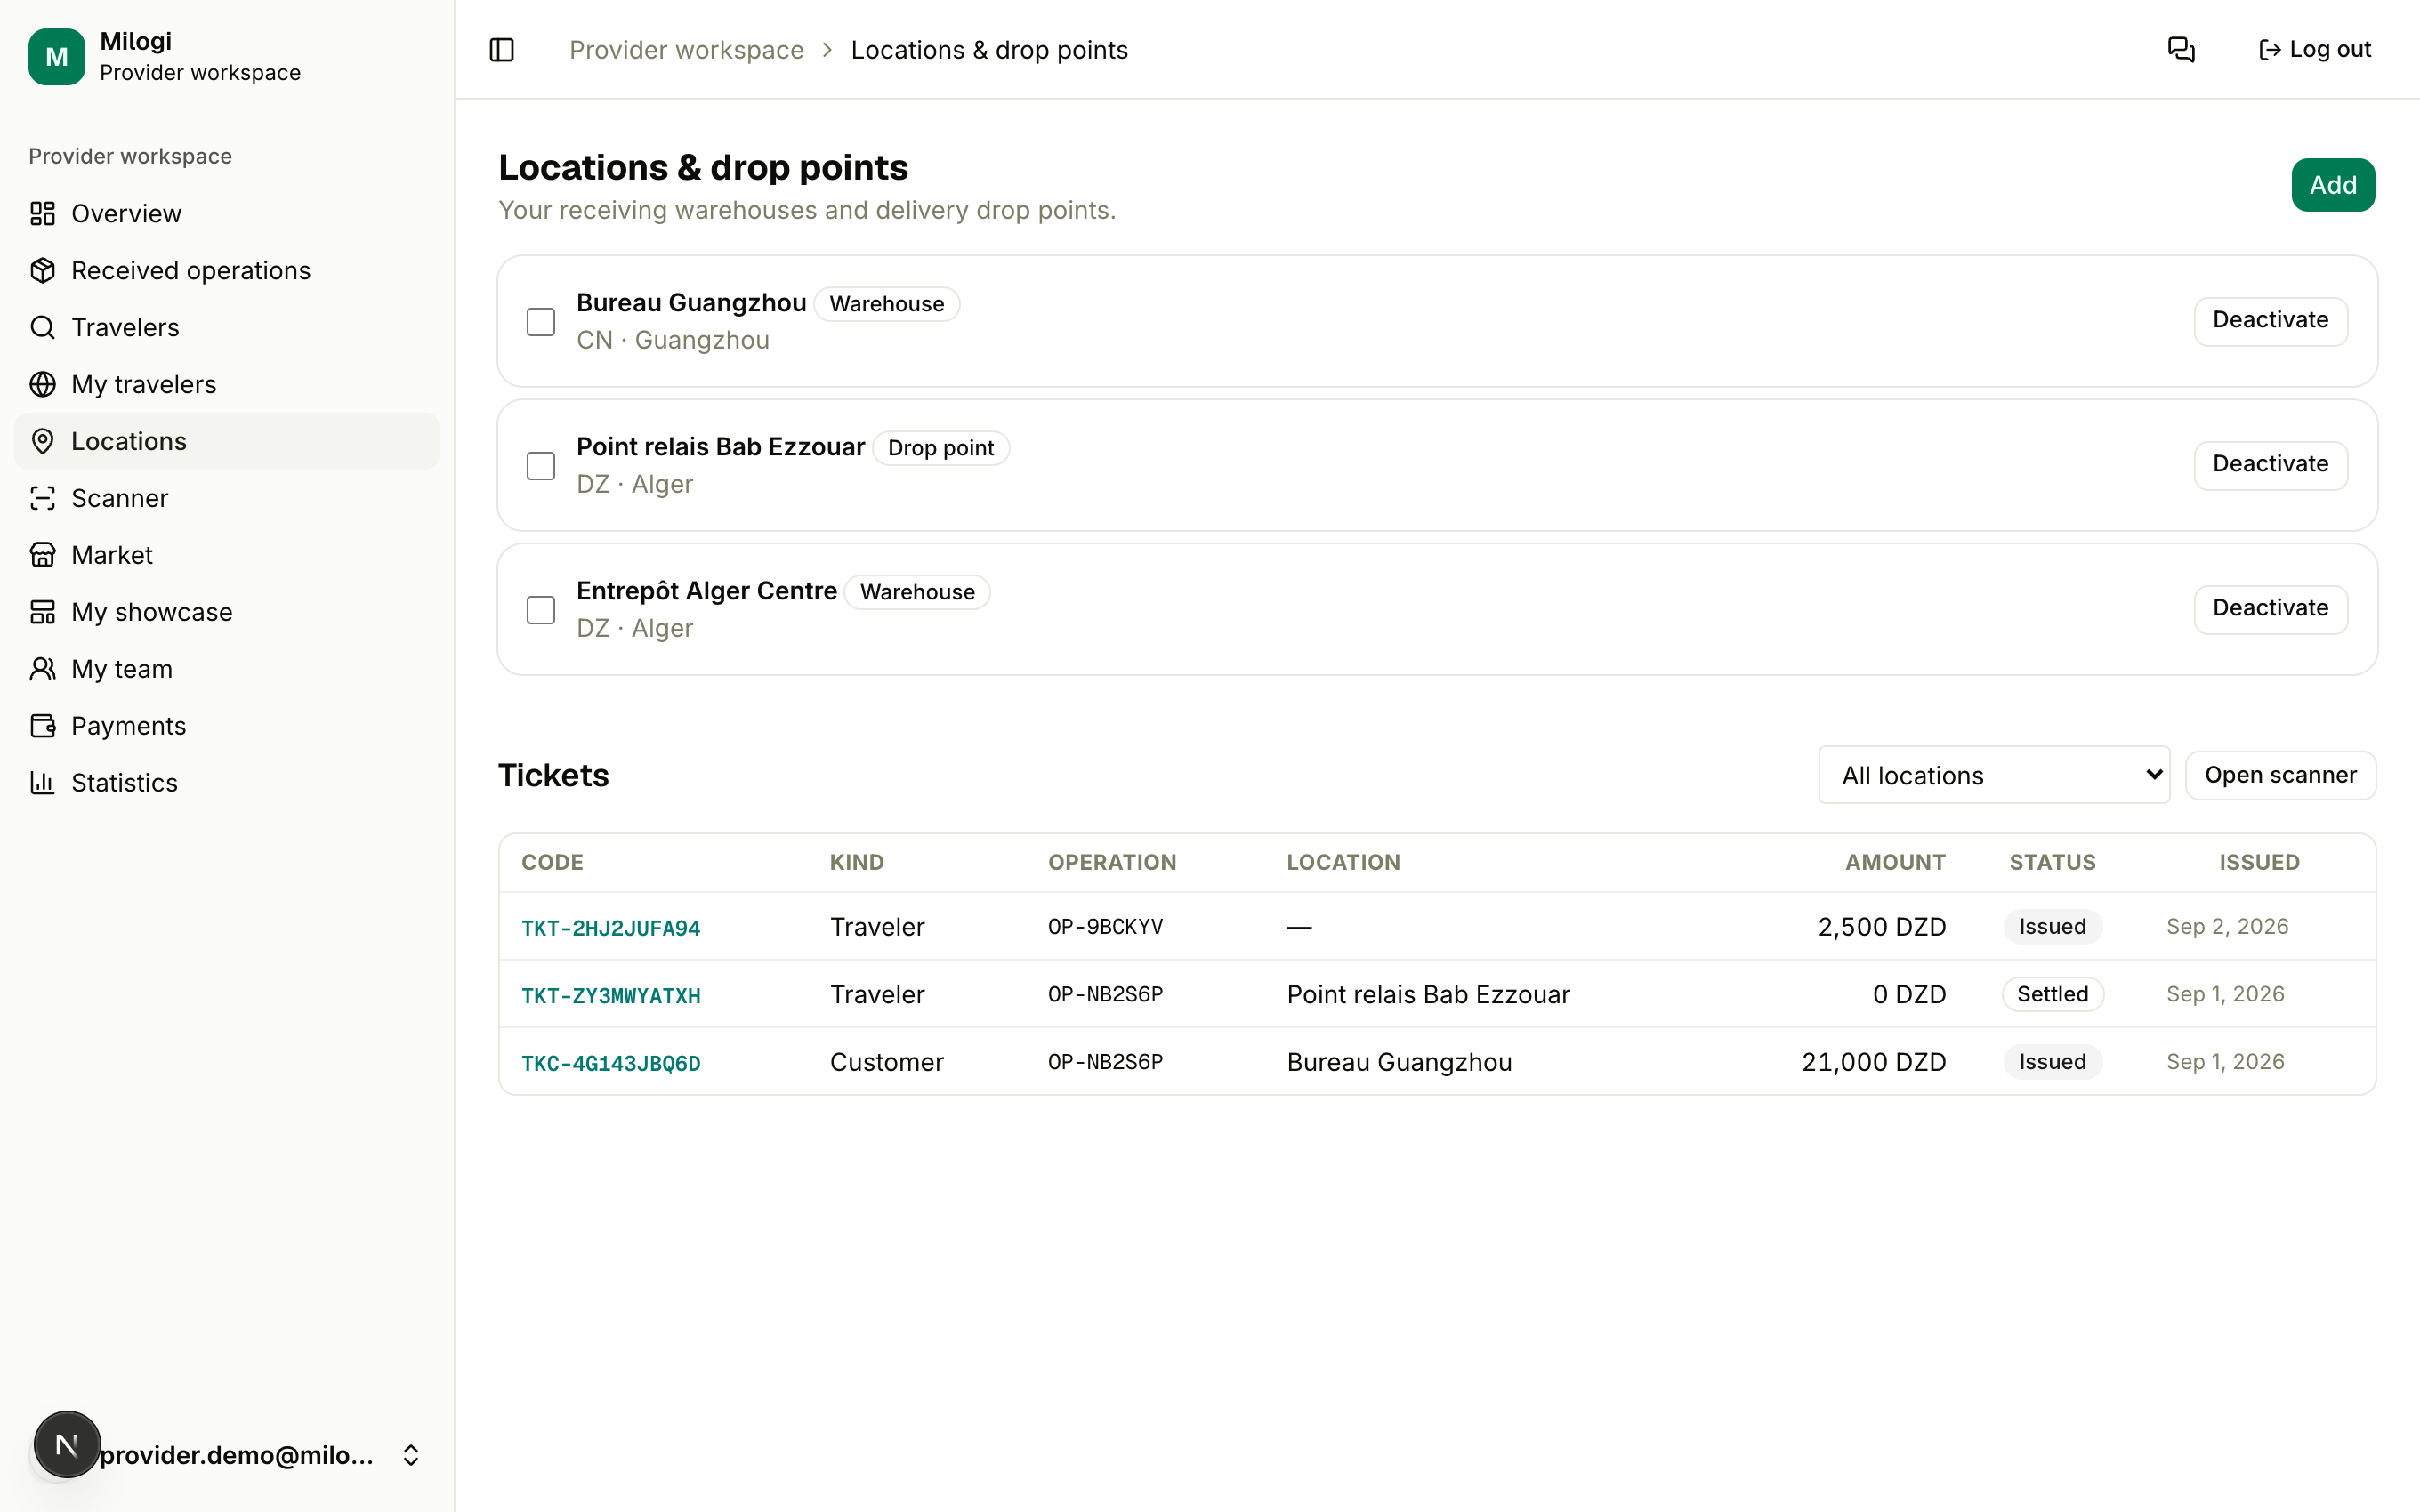
| Kind | Use |
|---|---|
Warehouse (STOCK) | Where shipments are received — e.g. your office in Guangzhou or Algiers. Customer tickets are attached to the operation's receiving location. |
Drop point (DROP_POINT) | Where customers collect their goods. Traveler tickets are attached to the operation's delivery location. |
Adding a location
- Click Add.
- Enter a Name, choose the Kind, the Country and City, optionally a Phone and an Address.
- Click Add.
Owner only
Only the account that owns the provider profile can create, edit, activate or deactivate locations. Team members see them and scan there, but cannot change them.
Activating / deactivating
Use Deactivate to retire a location without losing its history (it disappears from the operation dropdowns) and Activate to bring it back. Bulk selection lets you switch several at once.
Tickets per location
The bottom of the page lists Tickets, filterable with All locations / one location, with an Open scanner shortcut. This is where staff of a given drop point see what is expected there.
QR tickets
There are two kinds of tickets, both issued from the operation page:
Customer ticket (TKC-…) | Traveler ticket (TKT-…) | |
|---|---|---|
| Issued from | Locations & tickets → Issue customer ticket (needs a quote) | the batch card → Traveler ticket (batch must be assigned) |
| Attached to | the operation's receiving location | the operation's delivery location |
| Amount | the quote | the open payout lines for that traveler on this operation (editable in the ledger) |
| Extra fields | optional Estimated delivery date | number of pieces |
| Seen by | the customer, on their operation page | the traveler, on their dashboard |
| Scan actions | Collect customer payment | Mark goods received · Pay the traveler |
Each ticket card shows a QR code that encodes the scanner URL with the code pre-filled, so a phone camera lands directly on the right screen.
Scanning a ticket
Scanner in the sidebar (/p/scan):
- Scan the QR code with the phone (it opens the scanner with the code), or type the code (
TKT-…/TKC-…) and click Check. - The ticket card appears with its status (Issued → Scanned once checked) and, for traveler tickets, the batch and its pieces.
- Choose the action:
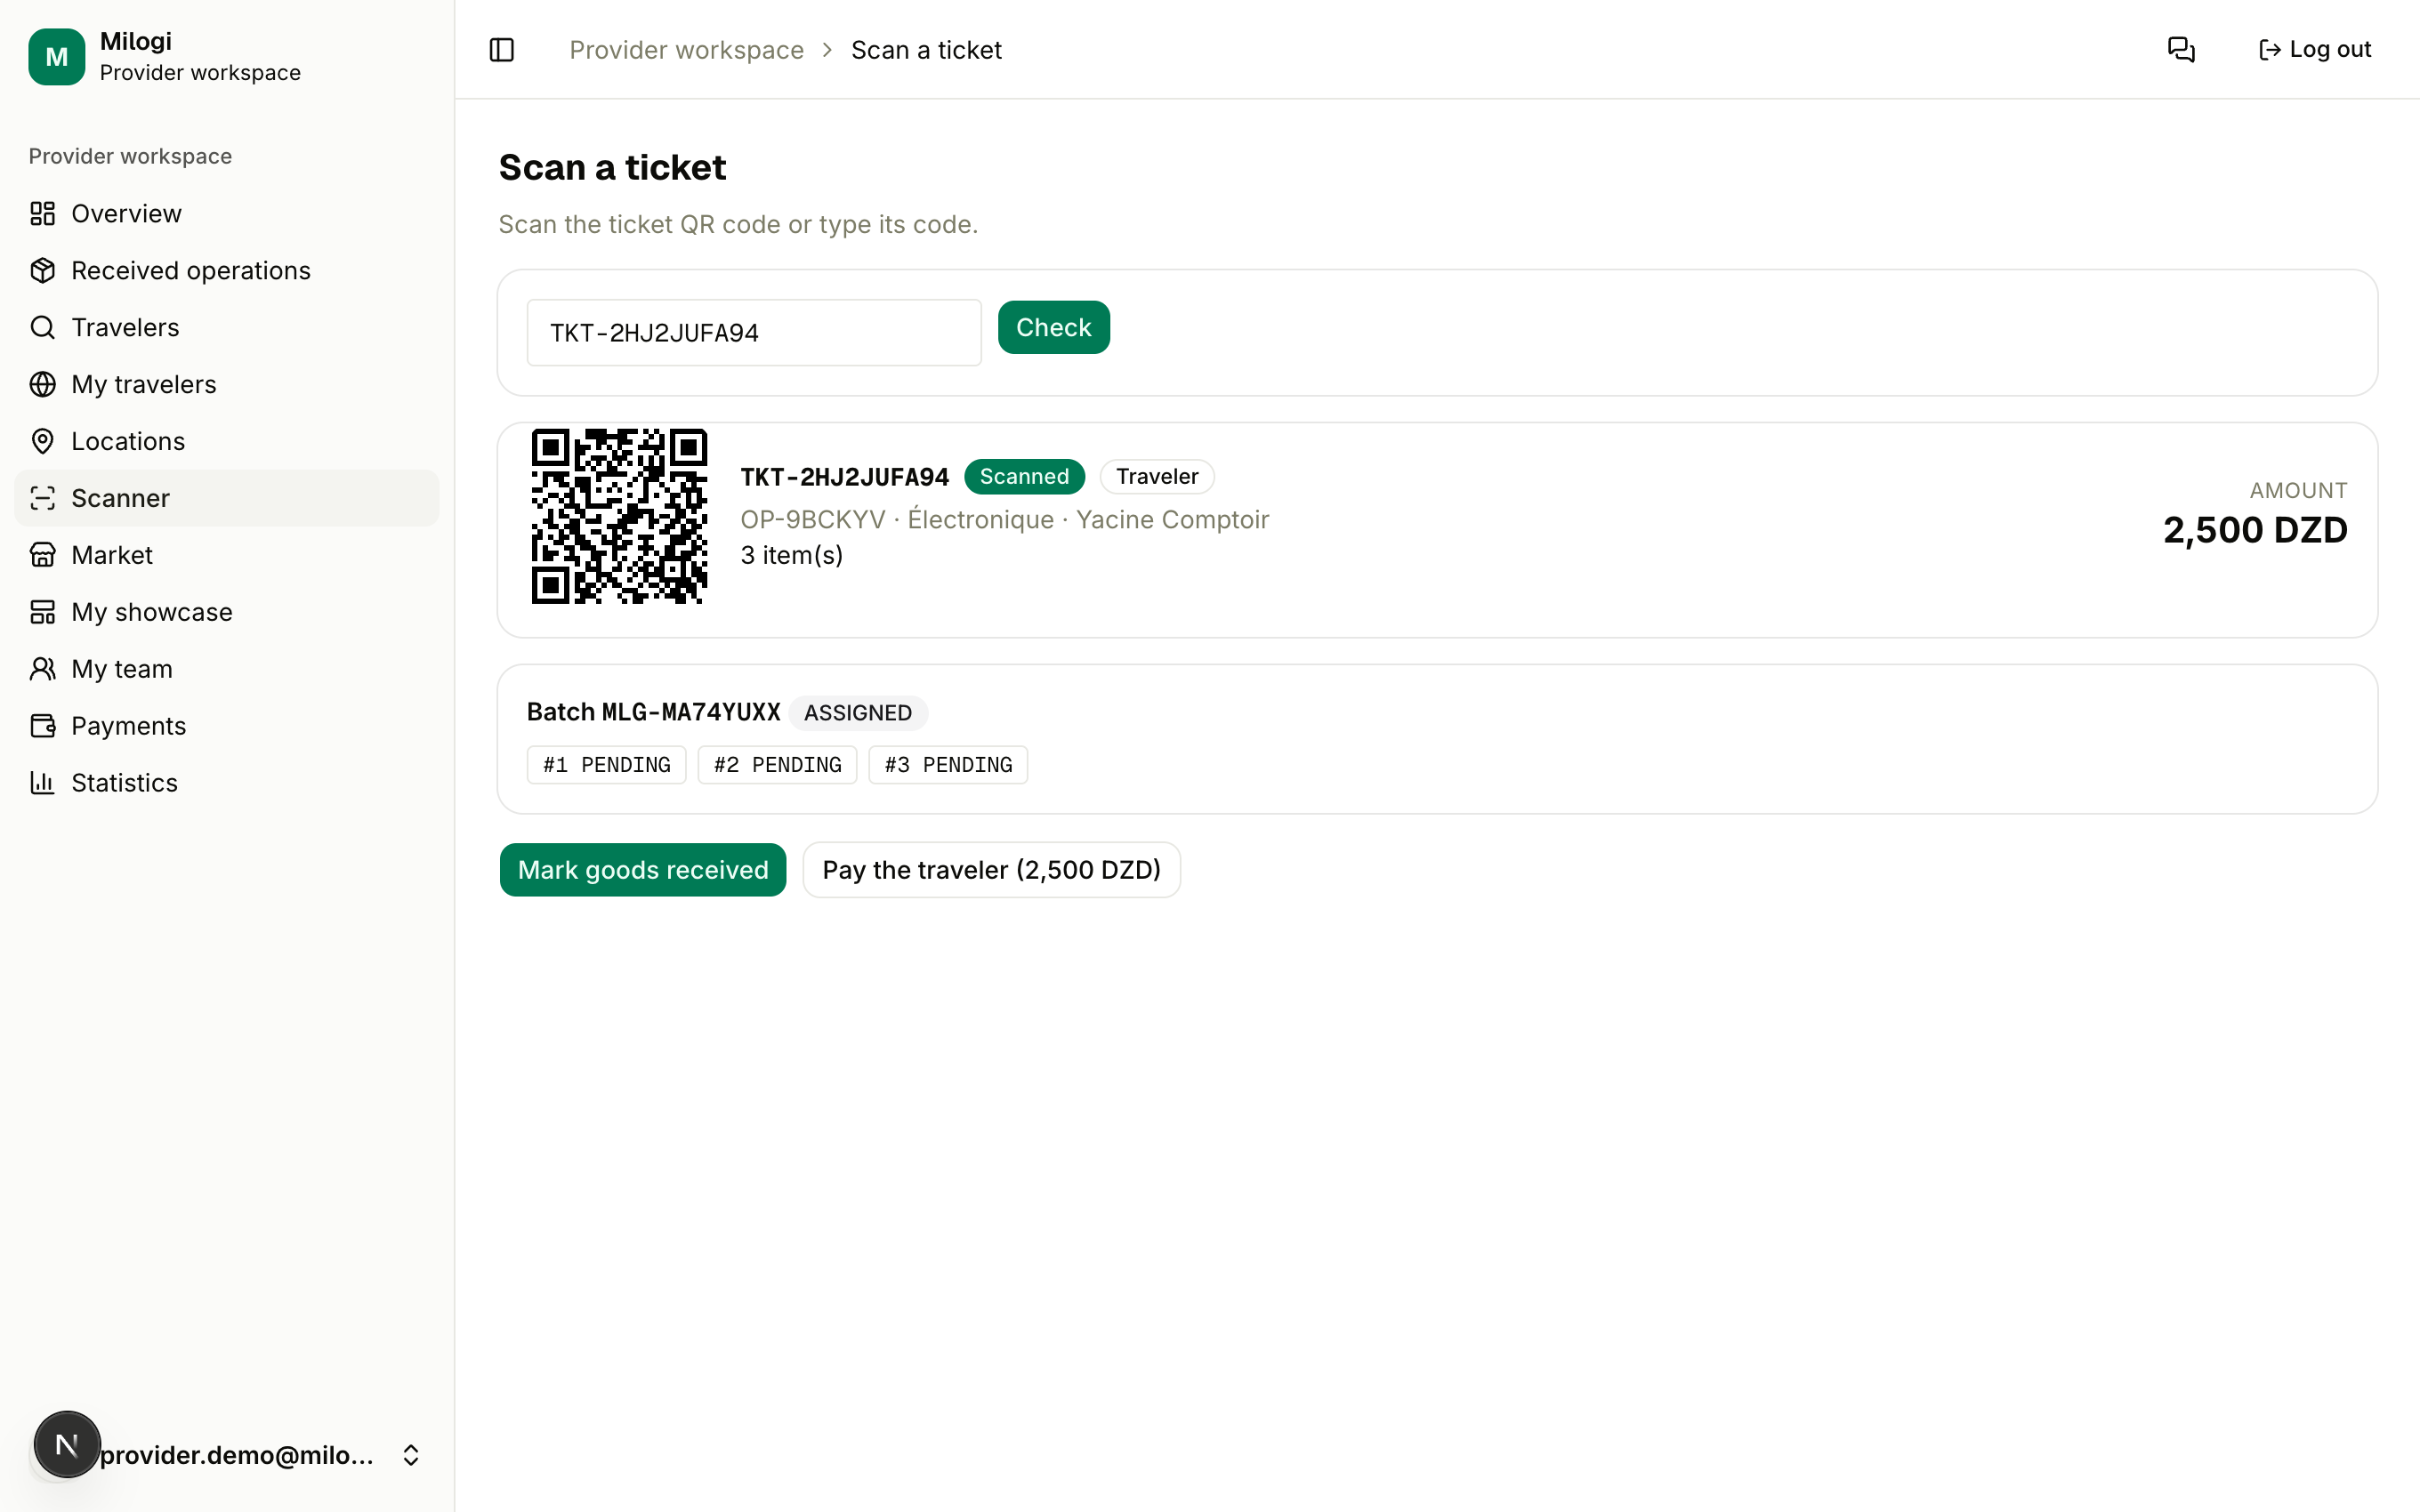
| Button | Effect |
|---|---|
| Mark goods received (traveler ticket) | The batch becomes DELIVERED: pending pieces are delivered, the payout line opens, the operation status is recomputed. Disabled once the batch is delivered (Goods already received). |
| Pay the traveler (amount) (traveler ticket) | All open payout lines for this traveler on the operation are settled in full and the ticket becomes Settled (Traveler paid). |
| Collect customer payment (customer ticket) | The Customer → you line of the operation is settled in full and the ticket becomes Settled (Already settled afterwards). |
Typical drop-point flow
The traveler arrives with the goods → scan their TKT ticket → Mark goods received → check the pieces (flag damaged/missing ones from the traveler side if needed) → Pay the traveler. Later the customer arrives → scan their TKC ticket → Collect customer payment → hand over the goods.
Staff and location scope
If a team member is restricted to certain locations, the scanner refuses tickets attached to other locations (or to no location) — This ticket belongs to a location outside your scope. Set the operation's receiving and delivery locations before issuing tickets so your staff can scan them. See Team.